Tip of The Week: Utilize Your Freezer

downloadThis week’s kitchen tip is brought to you by…your freezer. No, I’m not someone that has quarts of homemade chicken stock tucked away between my bags of frozen blueberries and peas. Though I definitely admire those who do. My kind of freeze-planning ahead usually comes from having too much of something or not wanting it to go bad right away. Here are the 4 things I usually have lurking somewhere in my freezer:

Ginger

Ever had a nubby little ginger root go bad on you in one week flat? Your freezer can prevent this. Simply cut off the end of one side of the root so the interior is exposed and pop it in a small ziplock. Then, use your microplane or small holes on a cheese grater to zest ginger into smoothies or stir-fries.

Lentils

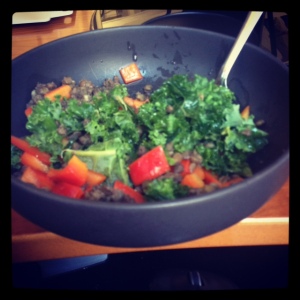
This has saved my work lunches for more than a year now. On a slow Sunday I make some variation of this lentil recipe and then freeze 1/4 cup amounts small Ziploc bags. Then, all I have to do is pack a kale salad and grab a bag of frozen lentils on my way out the door. At lunchtime, I microwave the lentils on a plate for about a minute and pop them on top of my salad so I can still have something warm to eat on the coldest days.

Grains

As I write this, I’m currently eating a salad enhanced by some farro I cooked months ago and  popped into bags the same way I do with lentils. You can do this with rice, barley, or any other grain, too. Just expect a little bit chewier texture than it’s original form.

Bananas

Is a bundle of bananas on your counter starting to freckle? Take off their peels, cut them in any size (or not), and to the freezer they go. Now you have a way to make your smoothies sweet and creamy whenever you need them.

That’s all for now, have a great weekend, and eat well!

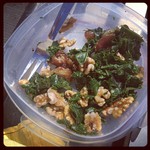
Tangy Kale Salad With Dates & Toasted Nuts

This salad has become my go-to work lunch lately. It’s fast to prepare—you don’t even need to dirty a knife—it takes on additions well (sometimes I add garlic or anchovies), and it’s filling enough to hold me through the day.

I often switch out the toasted nuts for whatever I have on hand (walnuts, sliced almonds, slivered almonds, etc.). The only important part is that you toast the nuts. It doesn’t take long, just a few minutes in a skillet on medium low until they change color a bit and they start to smell delightful. Oh, and if you do decide to use minced garlic, go with half a clove—for the sake of your coworkers.

Ingredients

1/2 bundle of curly kale

1 tablespoon of olive oil

2 tablespoons of wine vinegar (I like white)

10 or so toasted nuts (walnuts, sliced or slivered almonds, etc.)

5 pitted dates

Salt and fresh ground pepper

Method

Take the kale bundle and use your fingers to tear the leaves into bite sized pieces. Put all the pieces in a to-go container or the bowl you’ll be using.

Add the oil and massage it into the leaves with your fingers, then do the same with the vinegar. Do one tablespoon, mix, then the other.

Add the nuts (feel free to add beans here for more protein if you like), and then tear the dates into pieces and toss them into the mixture as well. Season aggressively with salt and pepper and let it marinate for a few hours if you can.

What’s your go-to packable lunch?

2 Recipes: California Breakfast Pudding & Sriracha Broccoli With Honey Butter

I thought I’d give you two recipes this morning, since I was feeling indecisive about which recipe to blog. Enjoy!

California Morning Pudding

Adapted from Food and Wine, specifically by Grace Parisi

Have you had chia seeds yet? They’re sort of the kale chips of the online food world right now;­­­ they seem seem to be everywhere. Given their health properties (hello, fiber, protein and omega 3s), rich history and interesting texture, they were bound to show up in my cooking rotation eventually. The seeds become boba or tapioca-like when soaked in liquid (in fact, some just sip them in water as a refreshing drink), but more importantly, they give me an excuse to eat pudding for breakfast.

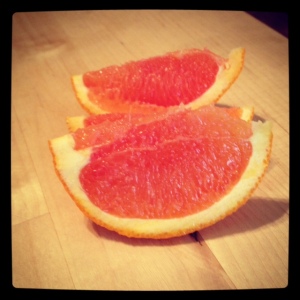
I call this California Morning Pudding because its toppings: dates, oranges and almonds, are all from my home state. Their contribution to the dish is a layer of acerbic sweetness, which is the just the right way to be woken up on a cold winter morning. Oh, and I hate to oversell you new ingredients here, but Cara Cara oranges are another thing you should seek out if you ever get the chance. They’re the less bitter cousin of grapefruit, who has still inherited that same gorgeous blush.

Ingredients

2 ½ cups unsweetened soy milk

½ cup chia seeds

2 tablespoons of honey

3 Medjool dates, pitted and torn into pieces

1 Cara Cara orange, peeled and sliced (you can sub grapefruit or any other orange)

6 or 7 almonds

Method

Mix together the first 3 ingredients in a quart container (I used a leftover yogurt container). Shake or stir the mixture, cover and let it sit in your refrigerator overnight.

In the morning, give the mixture a good stir. Spoon about a cup or so of the pudding into a bowl and top with the dates, oranges and almonds. The leftover pudding will last for a week.

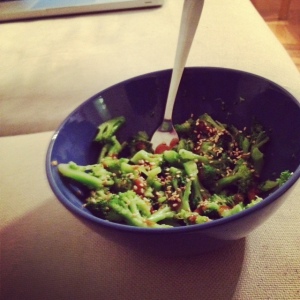
Broccoli With Sriracha Honey Butter and Toasted Sesame Seeds

I’ve been working from my pantry a lot lately. And if this is “cooking with what you have”, I’m thinking I should do it more often. Honeyed and spicy with just enough fat to add some flavor, this dish is great on its own as well as stirred into a salad or noodles.

Ingredients

1 cup broccoli, steamed in a steam basket or the microwave

generous squirt of Sriracha hot sauce (or more)

1 teaspoon of honey

½ tablespoon of unsalted butter or olive oil

toasted sesame seeds (optional)

Method

Top hot broccoli with the rest of the ingredients, stir and enjoy.

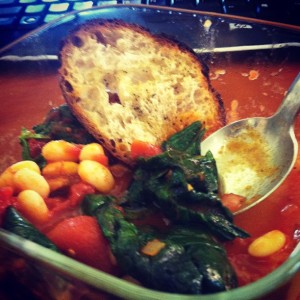
Rustic White Beans With Spinach (Or, Leftovers In A Ziplock Bag)

I love the surprises that come from my leftovers. This recipe was born from a slightly barren fridge and a lack of to-go containers. It’s perfect for work consumption, works well from cooking ahead (try making the beans and sauce in big batches on Sunday), but also would be equally successful from twisting open a jar of marinara and a can of beans-all a matter of preference. This recipe, which is sweet from the tomatoes and toothsome from the beans, is comforting and healthful at the same time.

Speaking of, you may notice a lack of holiday recipes on my site, and it’s intentional. There are so many cookie recipes, dips for parties, cakes, fudges, etc. being covered everywhere that I like to cover the other 24 days of the holiday season. Recipes when you want uncomplicated and flavorful meals that aren’t for your in-laws (not to mention I’m a horrendous baker).

Ingredients

1 cup of white beans (cooked from scratch or canned)

2 cups of red sauce (recipe below or your favorite jarred kind)

2 huge handfuls of spinach

2 slices of bread for toast

Method:

If you’re taking this meal with you, simply load all the ingredients except the bread in a large ziplock bag or to-go container. When you’re ready to eat, microwave for three minutes or simmer on your stove at medium heat for 10-15. Serve with your favorite toasted bread drizzled with olive oil for scooping.

My Go-To Red Sauce

1/4 cup olive oil

1 small onion, chopped

4 cloves of garlic, minced

3/4 lb button mushrooms

Salt, pepper and red pepper flakes to taste

1 bay leaf

2 cans of whole tomatoes

Method:

Warm the oil in a large saucepan at medium heat. Add the onion and saute until soft, about eight minutes. Toss in the garlic and stir until fragrant, about one minute. Add the mushrooms and spices, stirring for about six minutes until lightly browned and some of the juices have released. Don’t be afraid to go crazy with the black pepper here-it’s the base of your sauce so it’ll pay off later in flavor after simmering away on your stove.

Next, open your cans of tomatoes and get messy–squeeze each tomato  with your hands in the pot (low so you don’t spill on yourself, which I have a habit of doing), or squish with a potato masher. Add the remaining tomato liquid and the bay leaf, and bring the sauce to a simmer at medium low heat. Now, walk away. The longer it cooks, the chunkier the sauce will be, my ideal time is about 30-40 minutes. When your sauce is at the consistency of your liking, fish out the bay leaf and serve.

Note: You can play with the flavors by adding wine, tomato paste, etc. based on what recipe you’re using the sauce for-this is just a base, make it your own!

Porter-Soaked Refried Beans

* Adapted from Mark Bittman’s Food Matters Cookbook *

I’m not a big recipe repeater. My dinner cravings vary week to week, so I don’t often cook something more than once. Then, a few weeks ago, I had some leftover pinto beans from a pot I’d made, so I set out to make Mark Bittman’s Refried Beans recipe I’d been meaning to try. With what I had in my fridge (bell peppers, dark beer and half an onion), I cooked up my own version. The result was a flavorful—a combination of warm spices, rich beer and the smooth texture that defines the best kind of refried beans (in my eyes). And without overselling it, I’ll just say that I made a pot of pintos this week just so I could use the leftovers for this recipe.

Ingredients:

¼ olive oil

4 cups cooked pinto beans

1 bell pepper, chopped

½ an onion, chopped

1 tablespoon of cumin

½ tablespoon of chili powder

¼ teaspoon of cayenne

kosher salt and freshly-cracked pepper

¼ cup of dark beer (such as a stout or porter), more as needed

Method:

Warm the olive oil over medium heat in a medium saucepan or skillet.

When the olive oil is hot, add the beans. Mash the beans with a potato masher or fork until they’re broken down and about 75% smooth, about 4-5 minutes.

Add the bell pepper and onion and stir thoroughly. Add the spices and the salt and pepper. Raise the heat slightly to medium high. Keep mashing the mixture until the vegetables have softened, about 5 more minutes.

As the mixture becomes dry, add the beer to achieve your desired consistency (I enjoy my refried beans pretty smooth).

Taste your beans, and adjust the spices to your preferences. Remove from heat, and serve.

Serving suggestions: Tucked in burritos, along side brown rice, with cilantro, Dabbed with salsa next to eggs for breakfast. Tonight, I piled them in homemade tortillas, topped with chard, cilantro pesto and hot sauce.

Quiche, Revised

Find my published version of this article in the Vanguard here

While quiche had its most glorified time in the ’80s, there is a reason why many home

cooks still are serving it up today. For me, it’s because my mother made a damn good one and it was the one of the first dishes I learned to cook. Others like it because of its simplicity: add vegetables and meat, cream, herbs and lots of eggs in a pie shell—45 minutes later, you have silk custard on a buttery crust.

While I still agree with this mindset, I recently set out to revamp my trusted quiche recipe so I can use up more of the vegetables that seem to pile up in my fridge at the end of the week. I cut down on cream and eggs to make more room for vegetables, which allows for more texture contrast in the filling. I still use a premade crust (though without a bunch of artificial ingredients in the list) for time’s sake, but if baking is your thing, by all means make your own.

Ingredients

  • 2 tablespoons olive oil
  • 1 cup asparagus, cut into 1-inch pieces
  • 3 large leeks, cleaned and sliced crosswise
  • 1 cup Gruyere, grated
  • 3 eggs
  • 1 cup half and half
  • 3/4 cup chopped herbs (I used thyme, parsley and chives)
  • Salt and pepper
  • 1 pie crust (I like whole wheat)
  • 1 tablespoon Dijon mustard

Method

Preheat your oven to 375 degrees.

Bring the olive oil to medium heat in a large skillet. When it’s hot, add the asparagus and leeks. Sauté until the asparagus is tender and the leeks are soft, about 8–10 minutes.

Meanwhile, mix half and half, eggs and cheese in a small bowl with a fork or whisk. Whisk until the mixture is uniformly yellow. Stir in the herbs, salt and pepper.

Spread the mustard across the bottom of the piecrust so it’s an even layer. Next, add the vegetables, and top with the egg mixture. Bake for 30–40 minutes or until a toothpick or fork comes out clean.

Israeli Couscous With Dijon Thyme Sauce

Find my published version of this article in the Vanguard here

I’ll admit it—I’m a little bit of a homer. Since I grew up in California, I instantly love

Photo by Karl Kuchs

101cookbooks.com author Heidi Swanson from San Francisco. I’ve been addicted to the recipes from her recent book, “Supernatural Everyday,” since I bought it less than a month ago.

And then, I like to claim my Oregon side as well—which explains my devotion to Bob\’s Red Mill and all of his whole-grain products. From steel-cut oats to farina, the man has not let me down with solid, reliable ingredients.

The following recipe is a middle ground between these two devotions I have—Swanson’s book has a popcorn recipe with a similar dressing, and I used the Israeli couscous from Bob’s Red Mill (also known as pearl couscous). Wherever you come from, this dish is flavorful with its tangy herb-flecked dressing and ridiculously simple to put together. And of course, it highlights the best parts of the West Coast.

Ingredients:

  • 1 cup Israeli couscous, preferably whole wheat
  • 1/4 cup mixed herbs (I like chives, thyme and parsley)
  • 1 tablespoon Dijon mustard
  • 2 tablespoons olive oil
  • 1/2 large cucumber, sliced
  • 1 cup of spinach, torn into pieces
  • Coarse salt (like fleur de sel) and freshly ground pepper

Bring 1 1/4 cup of water to a boil. Salt the water and stir in the couscous. Let the couscous simmer covered until it’s al dente or until the water is absorbed, about 20 minutes.

Meanwhile, in a small glass, whisk together the herbs, Dijon and olive oil.

In a large bowl, toss together the spinach, cucumbers, cooked couscous and the dressing. Season the salad liberally with salt and pepper. Serves one to two.


Soba Noodles With Cilantro Pesto, Mint, and Spinach

find my original article here

As the weather heats up (it will eventually, right?) our tastes for dinner may shift from

Photo by Karl Kuchs

rich, meaty casseroles to lighter fare. The following recipe is quick to pull together with a little help from store-bought cilantro pesto (I like Pesto Outside The Box at the PSU farmers market), and it is still incredibly flavorful. If you have more time, make your own pesto: blend one bundle of cilantro, 1/4 cup walnuts or pistachios and 1/4 cup of olive oil until chunky. Then fold in 1/4 cup of grated Parmesan and proceed with the recipe.

Ingredients

  • 1/2 package soba noodles or whole-wheat spaghetti
  • 1/2 cup frozen shelled edamame
  • 2 cups spinach, rinsed
  • 1/2 cup cilantro pesto
  • 2 tablespoons mint, torn into pieces

Method

Bring a medium saucepan of water to a boil. Meanwhile, place edamame in a small bowl or mug and cover with about one cup of water. Microwave the edamame on high until soft, about three to five minutes.

When the water is boiling in your saucepan, add the soba noodles and cook according to package directions. You will know your noodles are done when they are floating at the top of the pot—careful, soba cooks a little faster

than pasta.

When the edamame are done, drain in a pasta strainer. Drain the cooked soba noodles in the same strainer. Rinse the noodles in lukewarm water so they cool a bit, and spread the noodles with your fingers to prevent clumping.

Next, take a large bowl and add half the spinach. Toss in the soba noodles and edamame and then half the pesto with tongs. Sprinkle in the torn mint and toss again. Then add the rest of the spinach and pesto and toss once more so everything is evenly coated with pesto. Serves one to two people.

Cookbook Review: Super Natural Every Day

Find my published version of this article in the Vanguard here

What’s On The Page:

Heidi Swanson, the cookbook author and blogger behind 101cookbooks.com, has a way

Photo by Adam Wickham

with writing about food, as she proves yet again in her new book “Super Natural Every Day.” Because she was a blogger before she was a cookbook author, Swanson offers substitutions in her head notes, allowing the cook the freedom to work with their pantry, not rush to the store for one specific ingredient.

Although she is a blogger, her prose isn’t so heavily laced with personal stories that we lose sight of what’s really important. Her use of imagery is skillful like a fiction writer, but careful like a chef. It isn’t uncommon to hear her describe a baked good “studded” with dried fruit, or a “flurry” of grated cheese atop a pasta dish. When she does go into personal anecdotes, its skillfully done, usually to give credit to the origins of her recipe ideas (specific friends or farmers).

The table of contents reads a lot like a menu—you get the title of the dish, then two or three standout ingredients to give you an overall sense of what will be making. For example: Sun Toast, whole-wheat seed bread and fresh eggs. Or Chanterelle tacos, Serrano chile, garlic and Parmesan.  It’s a unique way of informing the home cook of what each recipe has to offer.

Lastly, it should not go unnoticed how fantastic the photography is in Swanson’s book. All the photos—which Swanson takes herself—do a fantastic job of really capturing the region of Northern California where she lives, as well as the simplistic beauty of the food.

Cuisine:

The strange thing about Swanson’s food (on her blog and in this book) is that you often forget she’s a vegetarian. This may be because Swanson’s recipes are highlights of fresh produce, cheeses and whole grains, and rarely (though sometimes) use meat substitutes like tempeh or seitan. Swanson’s dishes are not stuck on one flavor profile, either. On one page, you find a Harissa dressing with flecks of cilantro, and on another, there may be a baked good that starts with coconut oil. The best thing about the recipes in this book is that she doesn’t spend time trying to convince her reader that her food is healthy and low in calories. That’s a given. Instead, she offers dishes that are unique and flavorful that just happen to be good for you.

What Stands Out:

The element of this book that is different from her first book, “Super Natural Cooking,” is simplicity. Many of the recipes are one-pot ordeals with small lists of ingredients. And nothing is a six-hour effort; the recipes are accessible and relatively easy to put together. Yes, sometimes there will be a less-recognizable ingredient for novice cooks, yet I would argue that part of really getting good at cooking is building a solid pantry, and Swanson helps you do that, one dish at a time.

What’s Not So Great:

Since this book is so successful in so many ways, finding a negative aspect to it is really nit picking. The one problem I have found is in the baking chapter. There can be some strange measurements (like 1 3/4 teaspoon) that can be a little challenging since baking is so precise. Yet this is in no way a reason to avoid the book (hell, it may even be that I’m a pretty pathetic baker myself).

The Verdict:

Heidi Swanson has really found a way to make her dishes accessible and enjoyable. She brings home cooks out of their comfort zones steadily and educationally, and it’s likely you’ll find yourself wanting to make several dishes from the book in one week.

And If You Choose To Meet Her…

Swanson and local baking celebrity Kim Boyce will be holding a meet up/signing at the Cleaners (next to Clyde Common). There will be snacks, a keg of beer and local food site OurFoodShed.com will be offering bags filled with scrumptious food items to go with book purchases. The event goes from 7 to 9 p.m. Friday, April 29, at The Cleaners, 403 SW 10th Avenue and Stark Street.
Kale Pesto

find my original article here

It’s impressive what a little blending can do for a vegetable. Kale—the almost-always-

Photo by Karl Kuchs

in-season green with healthful qualities but not always an exciting flavor profile—happens to fall under this category. In this recipe, the green is cooked quickly, then drained and blended with walnuts and hard cheese for something vibrant and flavorful. Not bad for a vegetable with a color that usually says, “meh.” Try this sauce tossed with whole-wheat pasta, drizzled over vegetables or as a spread for crostini. Feel free to substitute the walnuts for whatever you have on hand (almonds, pine nuts, etc.).

Ingredients

  • 1 large bundle of kale stems torn and discarded, any variety
  • 1 oz. walnuts
  • 1 tsp. of crushed red pepper flakes, more to taste
  • 1 tsp. salt
  • 1 clove of garlic
  • 1 oz. parmesan (not grated)
  • 1/4 cup olive oil

Preparation

Bring a large saucepan of water to a boil. Salt the water and add the kale. Boil the kale for 2–3 minutes or until slightly wilted. Drain and let cool.

While the kale cools, bring a small skillet to medium-low heat. Add the walnuts and red pepper flakes. Let the walnuts toast for around 5–7 minutes or until slightly browned. Remove from heat.

Drop the garlic clove into the food processor or blender. When it’s chopped, turn off the machine and add walnuts/red pepper flake mixture, salt and parmesan. Pulse until the mixture is chopped evenly.

When the kale is cooled, squeeze it with your hands to release as much liquid as possible. Add the kale to the food processor.

Then, with the machine running, drizzle in the oil until the mixture is a thick sauce, about one more minute. Taste the mixture for seasoning, adjusting salt as needed.

Scrape the pesto into a small bowl, and use on pasta, vegetables or crostini. Drizzle leftover pesto with olive oil and cover; it will stay good for 1–2 weeks. Serves 2–4 people, depending on usage.